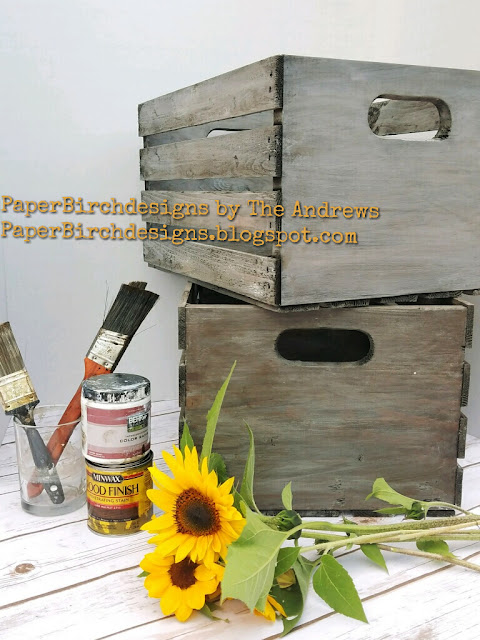
Transform Your Crates With A Distressed Look


Happy Monday everyone! Let's start out the week with something to look forward to. I don't know about you, but I always enjoy planning for a project and looking forward to doing something creative.

You ever have any projects that you have been planning for a while? This past weekend, Ray and I, worked on a DIY project that we had been talking about for a while. It finally happened, and it was oh so rewarding! 

We tranformed our crates and gave it a grey distressed look! 

Instructions: This is the before picture! The crates are just your ordinary run of the mill crates, that I got from Michaels. You can get your wood or crate of choice that you would like to distress. 


Start with a Dark Walnut Stain ( Minwax Woodstain 2716). Coat with the entire crate/wood with the stain.


Use a rag and wipe the excess stain. The longer you keep the stain, the darker the grey stain, and less you keep the stain, the lighter grey it will be. 


Take a rag, use white paint and rub the white paint dipped rag over the crate.  


Let the crate dry. 


 That's it! It's that easy! Try out the distressed look yourself!

To make it more fun, try it out with your spouse! We had a lot of fun getting our hands dirty and working together.


Comments

  1. Yes!! Try it out! Maybe you could show me how to add lettering to it!

    ReplyDelete

Post a Comment

Popular posts from this blog

Day 2: Color Block Technique

Welcome to Day 2 of Techniques Week! We made it through Day 1, I might have ink stains all over my hands, but they are stains of victory....and my husband was suspicious of why I wanted his shaving cream! Oh well, my mysteriousness is part of why he loves me! For Day 2, we're making this beautiful color block background on the card. You see how it just makes this whole card come alive? Step 1: Gather your goodies. You need a clear block ( I definitely recommend the stampin up blocks, they are the only ones this technique really works for). Get a piece of whisper white cardstock and the markers! Step 2: Color your block starting on one end with real red marker.  Step 3: Color with Tangelo Twist, right above the real red. Step 4: Color with yellow marker of choice, over the orange!  Step 5: Color with a blue marker of choice, over the yellow!  Step 6: Get everything away that you don't want getting wet!! and...Spritz the b...

Organized Card Giver Post #2: Prepare to Succeed!

Hey everyone,  If you’re reading this post, it means you’re somewhat serious about the New Year’s resolution to send cards to people you care about. Do me a favor and give yourself a quick pat on the back from me. Starting is half the battle.  Actually, it’s more important to start, than to succeed. People that start something are usually the ones that end up finishing strong. I tend to procrastinate, just like everyone else. But, just like with anything, if I tell myself, just start….just run for 5 mins, just workout for 5 mins, just clean for a minute, I build momentum to keep going forward. Then when the time is up, its not so bad. You can keep going more… That’s exactly what we’re going to do this week. We’re going to start strong. That’s all you need to do for this week. I know the New Year’s doesn’t start until a month from now, but we want to actually hit the ground running as soon as the new year hits. So, preparation is the key here. For this week#1, and...

Why I actually like opening my mailbox!

Subscribe for a monthly paper pumpkin subscription at https://paperpumpkin.com or to try it out for just 1 month sign up at https://www.stampinup.com/ECWeb/CategoryPage.aspx?categoryid=102600 . You don't have to leave your house or coordinate any supplies. You simply open a kit and craft. Everything you need for it is in the box. Go ahead try it out for just $20, you might just end up loving it a lot. Who doesn't like fun packages to open in the mail!! Here's all the stuff from July Paper Pumpkin!