
Music Themed Favor Boxes


To all the music fans out there! 

If you are reading this, it means you actually clicked on the link I posted. So here are some fun cringe-worthy music jokes. Thanks for reading my blog and helping support me in my blog's success. 

1. What's Bethoveen's favorite fruit? 
a. Ba-na-na-naaaaaaaa

2. Middle C, E flat and G walk into a bar. But the bartender won't serve them, why?
a. Because they are minors. 

3. How does a soprano sing the scale? 
a. Do Re Mi Me Me Me Me Me!


Now back to the blog, 

Make this favor box or purchase it from my etsy store! You're the music to my lyrics after all. 

When a beloved friend of the family asked me to make these beautiful favor boxes for a music themed bridal shower, I was very excited!! These boxes are perfect favor boxes or gift boxes for bridal showers, birthdays, choir, Christmas, any musical related events, karaoke nights....you get the theme! 
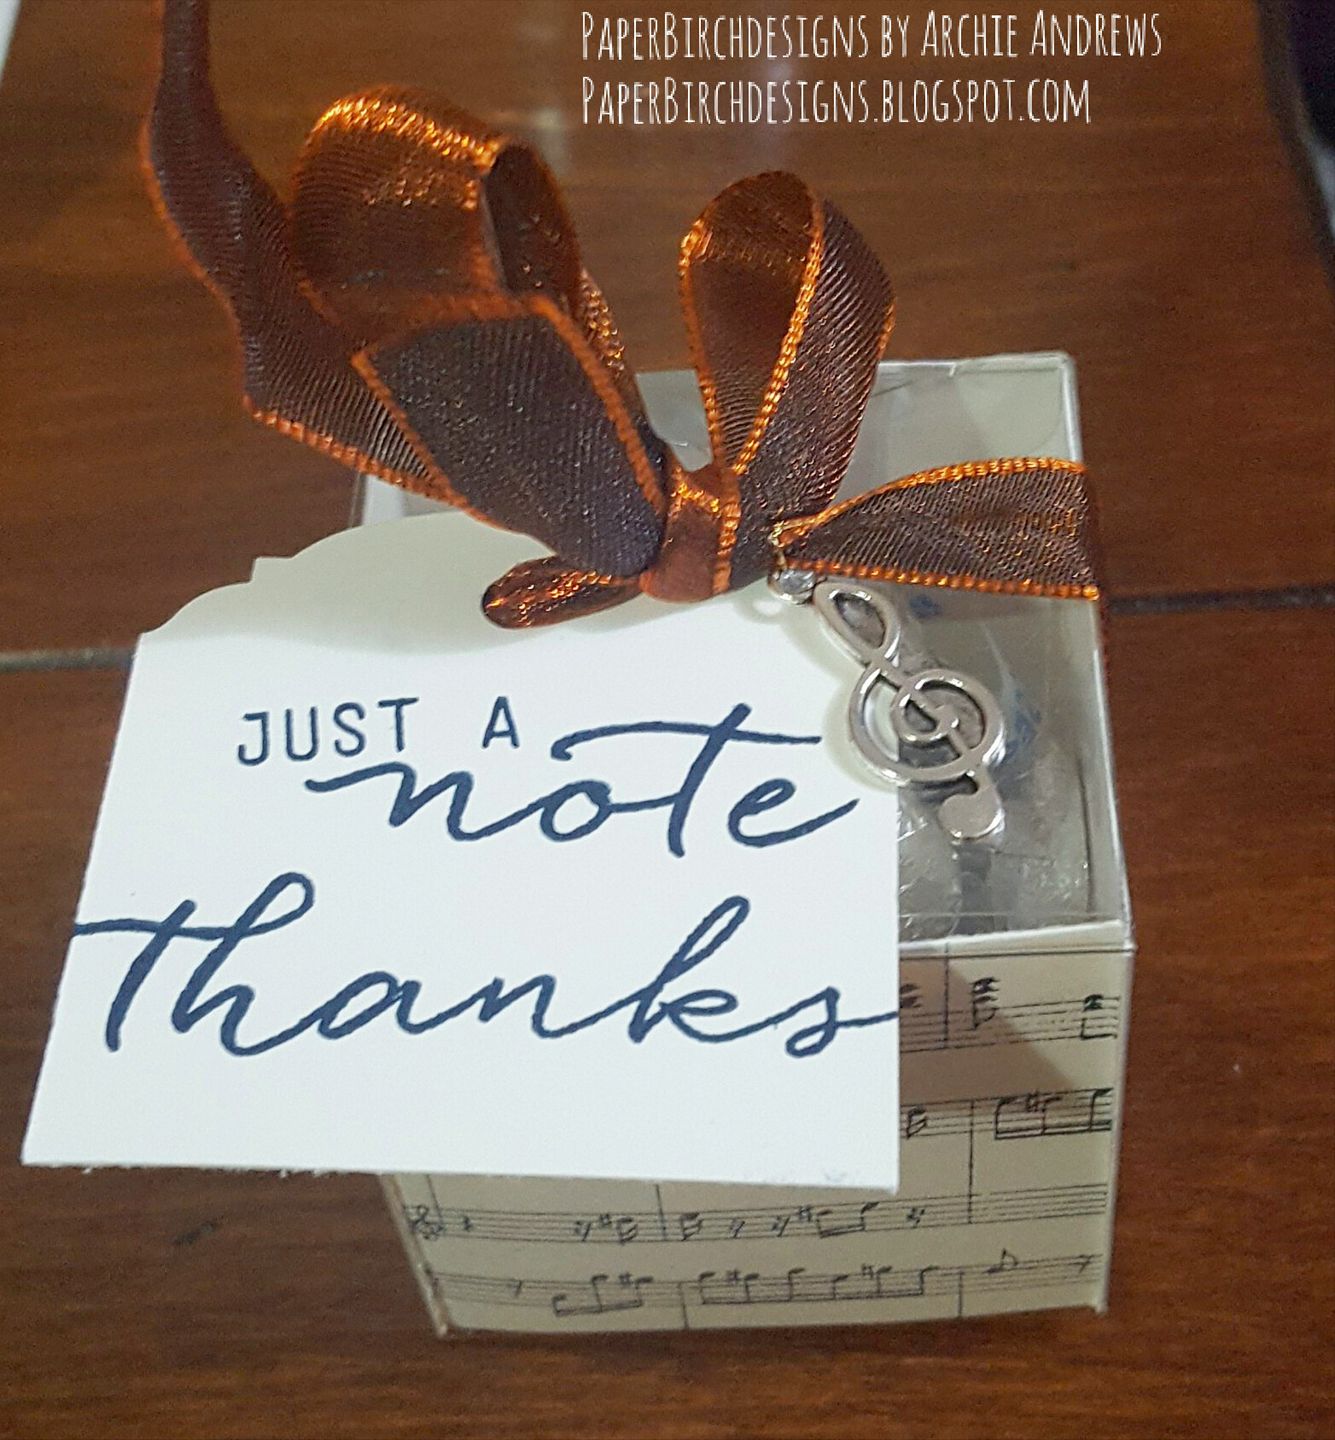


Instructions

1. To make this box, use the Tiny clear treat boxes listed in the product list below. Unwrap the treat box and assemble it. 
 2. Stamp the music background on the whisper white cardstock with Night of Navy Ink using block F
3. Cut out the stamped image in 2" x 2" squares for a total of 4 square. 
4. Slide the cut up squares into the treat box. 
5. Cut out a tag into 2" x Whatever length you'd like using the tag punch. Stamp the desired words on it. 
6. Add some candy or treats and use the ribbon to tie it all together. 

If you like this, stay tuned to check out some more music themed invites and thank you cards ideas!

If you would like to just purchase these treat boxes please visit my etsy store link!! 

Product List

Comments

  1. Hahahah! Now that is going to be stuck in my head. Love the minions! Hi Maria!! Thanks for reading the blog and leaving a comment!

    ReplyDelete

Post a Comment

Popular posts from this blog

Organized Card Giver Post #2: Prepare to Succeed!

Hey everyone,  If you’re reading this post, it means you’re somewhat serious about the New Year’s resolution to send cards to people you care about. Do me a favor and give yourself a quick pat on the back from me. Starting is half the battle.  Actually, it’s more important to start, than to succeed. People that start something are usually the ones that end up finishing strong. I tend to procrastinate, just like everyone else. But, just like with anything, if I tell myself, just start….just run for 5 mins, just workout for 5 mins, just clean for a minute, I build momentum to keep going forward. Then when the time is up, its not so bad. You can keep going more… That’s exactly what we’re going to do this week. We’re going to start strong. That’s all you need to do for this week. I know the New Year’s doesn’t start until a month from now, but we want to actually hit the ground running as soon as the new year hits. So, preparation is the key here. For this week#1, and...

Diy Popcorn Box for a Movie Night or a Movie themed Party

Smartfood popcorn and regular popcorn have become a necessity in our household. In my household, we don't just Netflix and chill. We Netflix and chill and snack! You have to date night with a purpose and cuteness. Check out this popcorn treat holder. I used stampin up thinlits and stamps to make this cute popcorn holder.  Stampset: Ready to Pop PhotoPolymer Stamp Set - $16.00 Item Number 141513 Thinlit: Popcorn Box Thinlit Dies -$33.00 Item Number: 141473 To purchase these stamps/thinlits click Shop Now: archieandrews.stampinup.net Instructions:  1. Cut out the paper width of the thinlit. You will be making 2 of these cut outs to make 1 popcorn box holder.  2. If you want to scallop the edges of the box, use the scallop thinlit on top edge of the popcorn box. This step is optional based on your personal preference.  3. You will need two of the these to make 1 popcorn box.  4. Now comes the fun stampin/embell...

Transform Your Crates With A Distressed Look

Happy Monday everyone! Let's start out the week with something to look forward to. I don't know about you, but I always enjoy planning for a project and looking forward to doing something creative. You ever have any projects that you have been planning for a while? This past weekend, Ray and I, worked on a DIY project that we had been talking about for a while. It finally happened, and it was oh so rewarding!  We tranformed our crates and gave it a grey distressed look!  Instructions: This is the before picture! The crates are just your ordinary run of the mill crates, that I got from Michaels. You can get your wood or crate of choice that you would like to distress.  Start with a Dark Walnut Stain ( Minwax Woodstain 2716). Coat with the entire crate/wood with the stain. Use a rag and wipe the excess stain. The longer you keep the stain, the darker the grey stain, and less you keep the stain, the lighter grey it will be.  Take a r...