Flirty Flamingo Part 1: Marble Technique

Rise and shine, beautifuls!! It's Day 1 of the Techniques week! I hope you are as excited as I am. 
Follow along with the tutorial and post comments. Each comment gets you added into the raffle pool. At the end of the week, I'll pull out one name and the winner gets an ink pad for free!! 

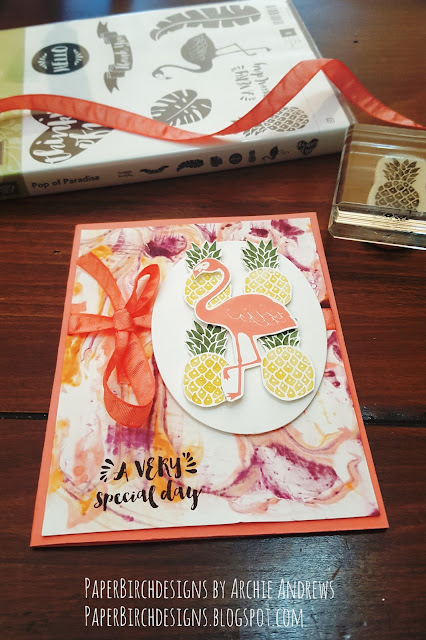
This is the card I made using the marble technique! Check out the instructions below and you can use this technique too. It's really easy!! I promise!


Step 1: Grab a shaving cream, shake it up, get something to pour it on! 


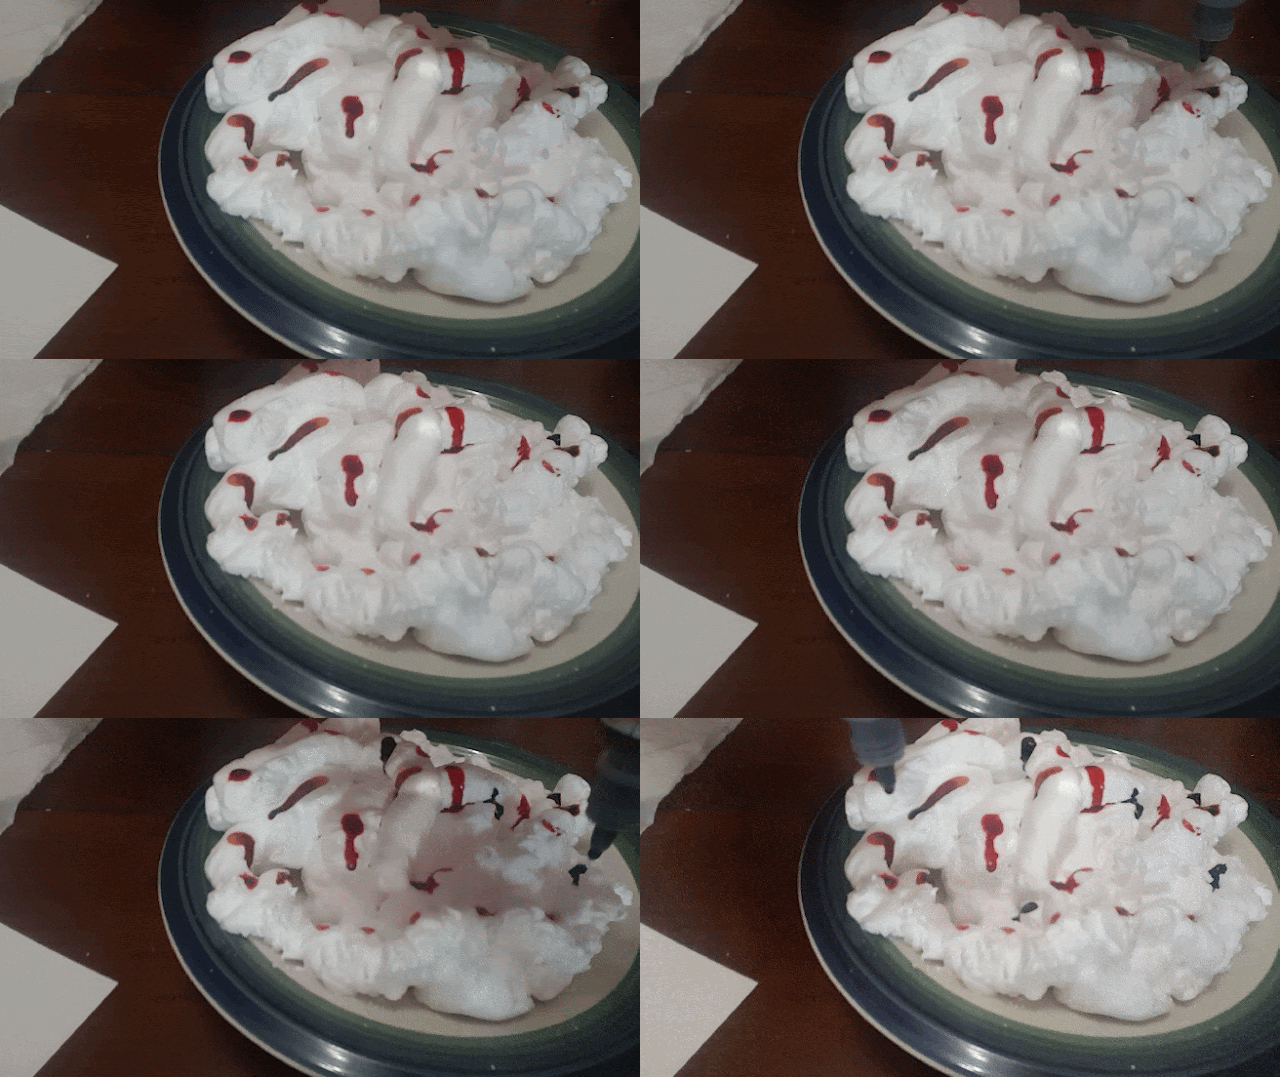
Step 2: Spray the shaving cream around on a plate. 


Step 3: Get the ink refill colors that you want and drop colors onto the shaving cream! 


Step 4: Take a whisper white cardstock (colors show up best on the white, but you could use this on any paper)


Step 5: Scrape away the shaving cream ! 


Step 6: Dry and clean out the paper, and you've got your marble paper! It really is that easy! 


Alright, see how easy that was. Go do it! No excuses! If you don't try it now and you keep putting it off, you'll never do it. 

This is the part 1 of the tutorial that makes the Flirty Flamingo Card. This paper is what I used as a background for my flamingo card! Part 2 to come later. 

Get the featured products shown in this technique. Use workshop code S6F6XFTC at
 http://www.stampinup.com/ECWeb/default.aspx?dbwsdemoid=2156819

For techniques week, throughout the week : every 25$ you spend, you receive a free item from the clearance bin from me! 
For every $150 you spend, you receive 4 items from the clearance bin and a hostess reward (worth 15%) of your order for FREE! 
Make sure you use the workshop code (S6F6XFTC)Order today and join along! In fact order right now. The sooner you place the order, the sooner the delivery man will be over with your goodies! 

And be sure to post a comment after you try this out. If you haven't subscribed to the blog yet, subscribe so you don't miss out!


Product List

Comments

Post a Comment

Popular posts from this blog

Organized Card Giver Post #2: Prepare to Succeed!

Hey everyone,  If you’re reading this post, it means you’re somewhat serious about the New Year’s resolution to send cards to people you care about. Do me a favor and give yourself a quick pat on the back from me. Starting is half the battle.  Actually, it’s more important to start, than to succeed. People that start something are usually the ones that end up finishing strong. I tend to procrastinate, just like everyone else. But, just like with anything, if I tell myself, just start….just run for 5 mins, just workout for 5 mins, just clean for a minute, I build momentum to keep going forward. Then when the time is up, its not so bad. You can keep going more… That’s exactly what we’re going to do this week. We’re going to start strong. That’s all you need to do for this week. I know the New Year’s doesn’t start until a month from now, but we want to actually hit the ground running as soon as the new year hits. So, preparation is the key here. For this week#1, and...

Organized Card Giver Post #4 Technology Hack For Keeping Addresses And Birthdays Organized

Hey everyone,  Last post I mentioned keeping a google document for birthdays. Were you thinking.....I'm sending handmade cards to avoid technology and how impersonal it feels! So, why is this woman, asking me to use technology for birthdays?!  I ask myself everyday, what the balance is between technology and personal. I like to use personal handmade gifts and cards or spend quality time with family and friends. But, I like to use technology almost like a personal assistant. If you are related to me, you know I would not even know what to buy at the grocery store if it weren't for my amazon Alexa.  I tend to forget things. Do you ?  I will at times have momentary lapse and forget even the names of my colleagues and then I end up with an awkward..." hey you!! " Very similarly...I forget birthdays, not because I don't care, but because I just can only keep so many things in my head. This is where I like to use technology.  One of the reasons ...

Diy Popcorn Box for a Movie Night or a Movie themed Party

Smartfood popcorn and regular popcorn have become a necessity in our household. In my household, we don't just Netflix and chill. We Netflix and chill and snack! You have to date night with a purpose and cuteness. Check out this popcorn treat holder. I used stampin up thinlits and stamps to make this cute popcorn holder.  Stampset: Ready to Pop PhotoPolymer Stamp Set - $16.00 Item Number 141513 Thinlit: Popcorn Box Thinlit Dies -$33.00 Item Number: 141473 To purchase these stamps/thinlits click Shop Now: archieandrews.stampinup.net Instructions:  1. Cut out the paper width of the thinlit. You will be making 2 of these cut outs to make 1 popcorn box holder.  2. If you want to scallop the edges of the box, use the scallop thinlit on top edge of the popcorn box. This step is optional based on your personal preference.  3. You will need two of the these to make 1 popcorn box.  4. Now comes the fun stampin/embell...